Cloud-init is a package that contains utilities for early initialization of cloud instances. (Source: ArchWiki). It allows headless and painless configuration for spinning up new cloud instances, so no more installing from scratch for every new instance. Check out Proxmox’s documentation for more info on its support within Proxmox VE.
Debian actually provides cloud-init ready images for deploying now, so it is even more convinient than before.
Creating VM
Firstly we will need to create a VM as the basis of operations. Click Create VM on the top right corner. Then we just follow the interactive guide provided by the GUI.
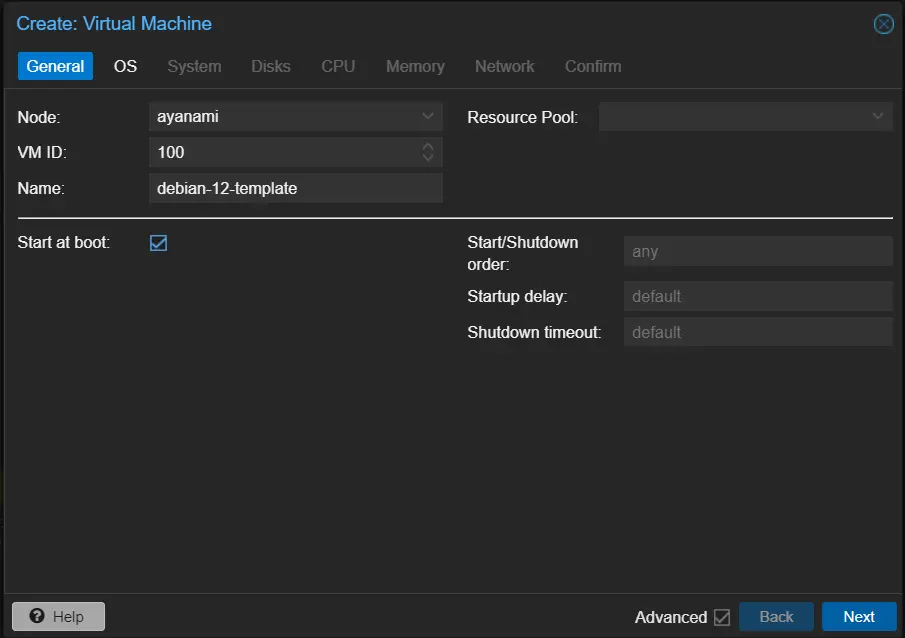
Make sure to check the Advanced box to have all options show up.
Set your instance name and ID as you wish, and check Start at boot if you want it to do so, which you probably do. This will not boot the template, but any VMs you have created from it.
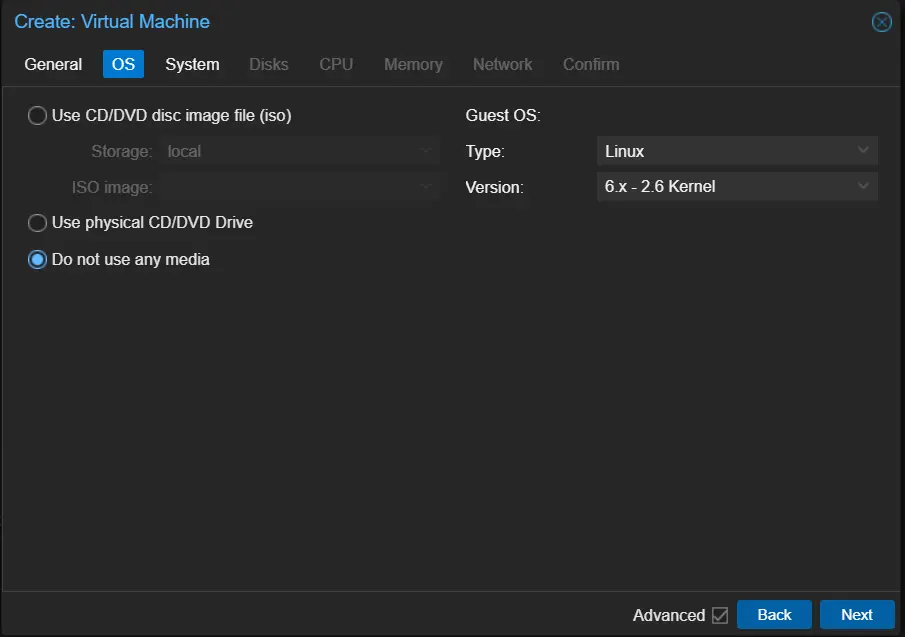
Select Do not use any media for the OS image, as we will not be installing by hand, but rather by importing a ready-made image.
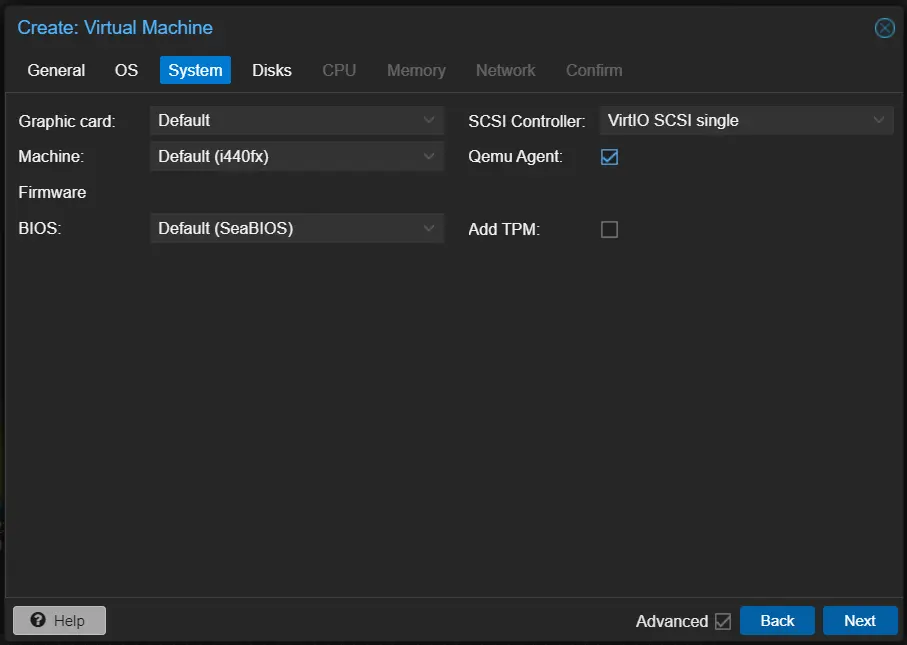
Check Qemu Agent, and leave everything as is in the image. Qemu Agents will allow for extra operations from the host. VirtIO SCSI single should be used, as it has the best performance, stated here.
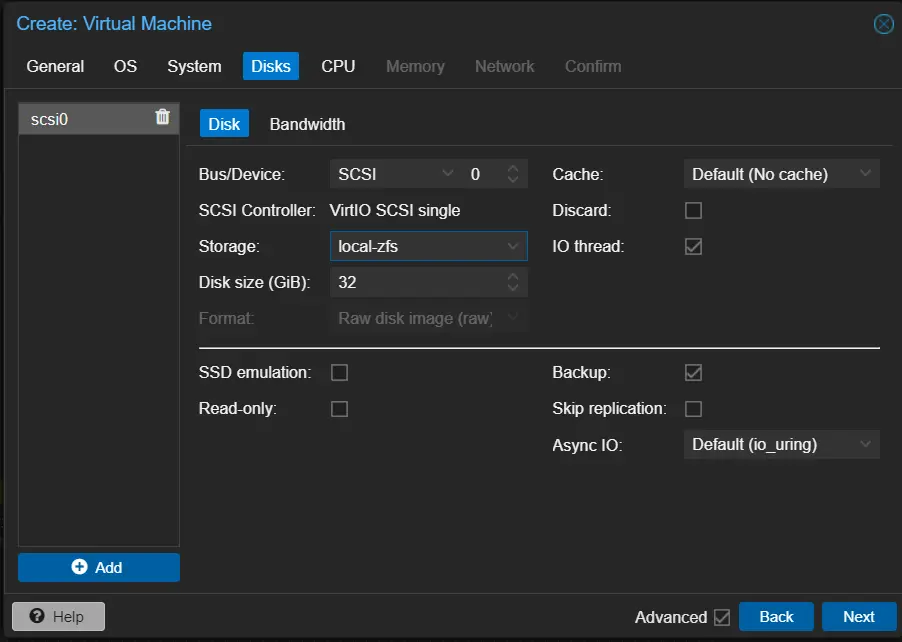
Delete the disk Proxmox VE has created for you by default, as we will not be needing it.
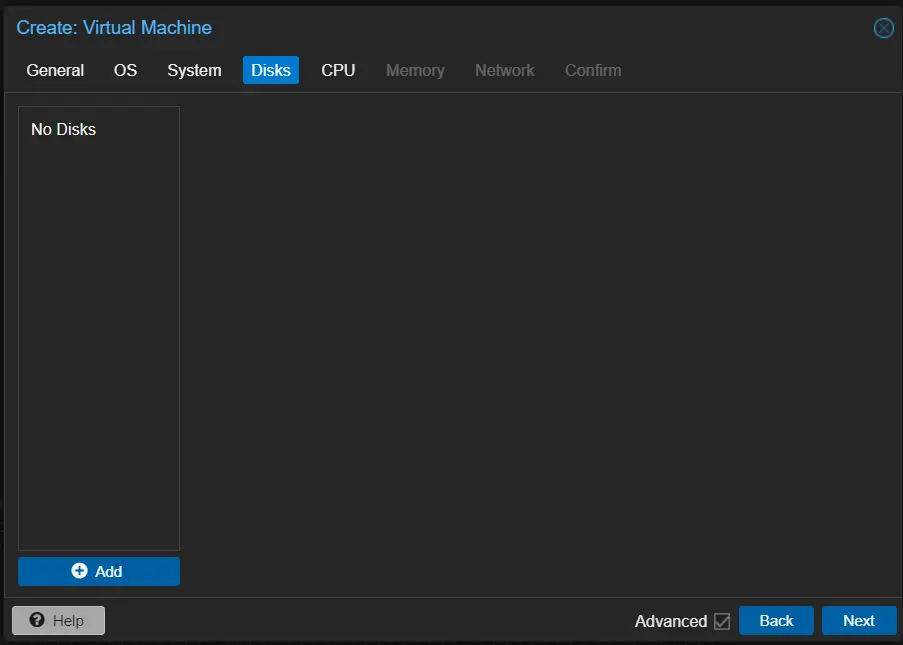
This is how it should look like after you have deleted the disk.
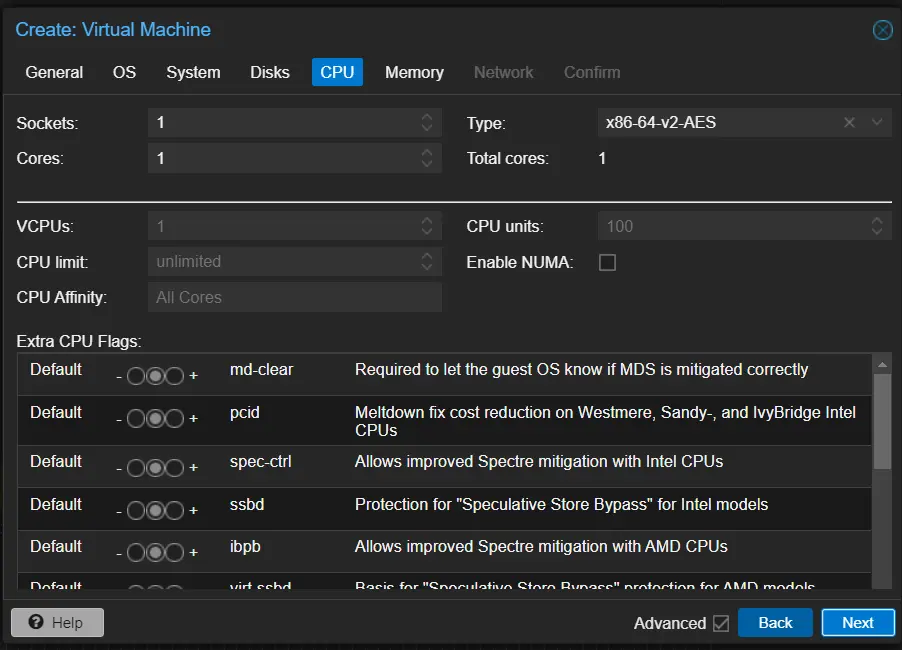
Regarding the CPU type,
- If you don’t care about live migration or have a homogeneous cluster where all nodes have the same CPU and same microcode version, set the CPU type to host, as in theory this will give your guests maximum performance.
- If you care about live migration and security, and you have only Intel CPUs or only AMD CPUs, choose the lowest generation CPU model of your cluster.
- If you care about live migration without security, or have mixed Intel/AMD cluster, choose the lowest compatible virtual QEMU CPU type.
For QEMU CPU type compatibiliy,
- kvm64 (x86-64-v1): Compatible with Intel CPU >= Pentium 4, AMD CPU >= Phenom.
- x86-64-v2: Compatible with Intel CPU >= Nehalem, AMD CPU >= Opteron_G3. Added CPU flags compared to x86-64-v1: +cx16, +lahf-lm, +popcnt, +pni, +sse4.1, +sse4.2, +ssse3.
- x86-64-v2-AES: Compatible with Intel CPU >= Westmere, AMD CPU >= Opteron_G4. Added CPU flags compared to x86-64-v2: +aes.
- x86-64-v3: Compatible with Intel CPU >= Broadwell, AMD CPU >= EPYC. Added CPU flags compared to x86-64-v2-AES: +avx, +avx2, +bmi1, +bmi2, +f16c, +fma, +movbe, +xsave.
- x86-64-v4: Compatible with Intel CPU >= Skylake, AMD CPU >= EPYC v4 Genoa. Added CPU flags compared to x86-64-v3: +avx512f, +avx512bw, +avx512cd, +avx512dq, +avx512vl.
This choice is up to personal taste. You can customize this setting after you create the template, or even for each instance.
For Memory and Network settings, set them to what you see fit.
Next, some operations using ssh / console is needed, as Proxmox VE do not have them ready in the GUI.
Readying VM
Add a serial console to the VM with this command. Some cloud-init images require a serial console, and I believe that it is the case for Debian as well. This has the added benefit of allowing us to monitor the output from cloud-init, as it is passed to the serial console. You can also use this as a recovery method to the VM from the host’s command line using qm terminal <VM ID>. If you prefer serial over VGA monitors, you can also set the monitor type for the WebUI using qm set <VM ID> --vga serial0.
Not having this serial console can lead to errors or kernel panic, as the bootloader is configured to output into the serial console by default. This is mentioned here
qm set <VM ID> --serial0 socket
The Debian team has prepared a variety of cloud images available for download. Goto https://cloud.debian.org/images/cloud/, and scroll down to find the release of your choice. Personally I prefer the “latest” flavor.
I will download the “genericcloud” “amd64” qcow2 image, as it fits me best.
From the Debian Wiki: Q. What is the difference between the generic and genericcloud images? A. The difference is in the pre-installed kernel; the images are otherwise identical. The generic image uses Debian’s standard Linux kernel packages, while the genericcloud image uses the cloud kernel build. The cloud kernel disables a large number of device drivers and primarily targets the Amazon EC2 and Microsoft Azure VM device models. It may be usable in other environments, but for maximum compatibility we recommend using the generic images.
Then we will need to resize the image, otherwise the image will be considered “full”, unavailable for any operations.
qemu-img resize <Image Filename> <Size, e.g. 5G>
Import the image file to our VM
qm importdisk <VM ID> <Image Filename> <Storage, be careful if you use LVM / ZFS>
Return to the web GUI. Go to Datacenter -> node -> VM -> Hardware. We will need to make 3 changes here.
- Add -> CloudInit Drive -> Storage same as your VM disk storage -> Add
- Unused Disk 0 at the bottom. This is the disk image we have just imported. Click on it, then choose “edit”. As I’m using SSDs, I’m going to make two changes - check “Discard” and “SSD emulation”. Also check “IO thread” if it isn’t checked.
- Display -> edit -> Graphic card -> choose “default”. I prefer this over a serial console for it being graphics based.
Go to “Options” for this VM. Double-click “Boot Order”, enable “scsi0”, and move it to the second posision, as we might still want to boot from the virtual optical drive.
You can read more about all the VM options at Proxmox VE Documentation
Right-click the VM on the left side, and choose “convert to template”. Wait for it to finish, and now you have a template ready for use.
Using the template
To use the template, right-click again on the template, and choose “clone”. Name your VM, set a VM ID, and remember to set it to “Full Clone”, so the VM does not rely on the template.
Now we can go to the new VM -> Cloud-Init, and set your user name to root, root password, ssh public keys, and networking. Remember to set them so you don’t get locked out like I did.
Start the VM when you feel ready.
Final touches
Go to Console. If you see “starting serial terminal on interface serial0”, just press enter and the console will load. Wait for cloud-init to finish loading, and then ssh into the VM with username “root” and the password / ssh key you chose. If you forgot, delete the instance and spin up another one. Good thing templates are convenient to clone!
Lastly install qemu-guest-agent and enable it.
apt install qemu-guest-agent && systemctl enable qemu-guest-agent --now
References & Sources
- Proxmox VE Documentation: Qemu/KVM Virtual Machines
- Proxmox VE Documentation: Cloud-Init Support
- Learn Linux TV@YouTube: Proxmox VE - How to build an Ubuntu 22.04 Template (Updated Method)
Last modified on 2026-08-19